In this article
The short answer
Start with photos that still contain locations
Use the TrailVid iPhone beta and photos from the trip with location and capture-time information. Original camera photos are the most useful input. Images whose metadata was removed cannot tell TrailVid where you were; you can add those missing destinations manually after import.
When you open photo import, tap Choose photos instead to select individual images in the Apple photo picker. If your trip dates are known, set Trip starts and Trip ends, then tap Find places to scan that window. Scanning by date needs full photo-library access; the picker remains available with limited access.
Get the iPhone app
Import the photos and export the map video
Open Photos import
Tap the trip name to open the trip library, choose Import, then Photos. For the selection workflow used below, tap Choose photos instead, allow access to the trip photos when prompted, and select the images.
Wait for the proposed route
Let the scan finish. Large selections and iCloud photos can take time to prepare. Read the skipped-photo message and check which places the selection can actually support.
Review before creating the trip
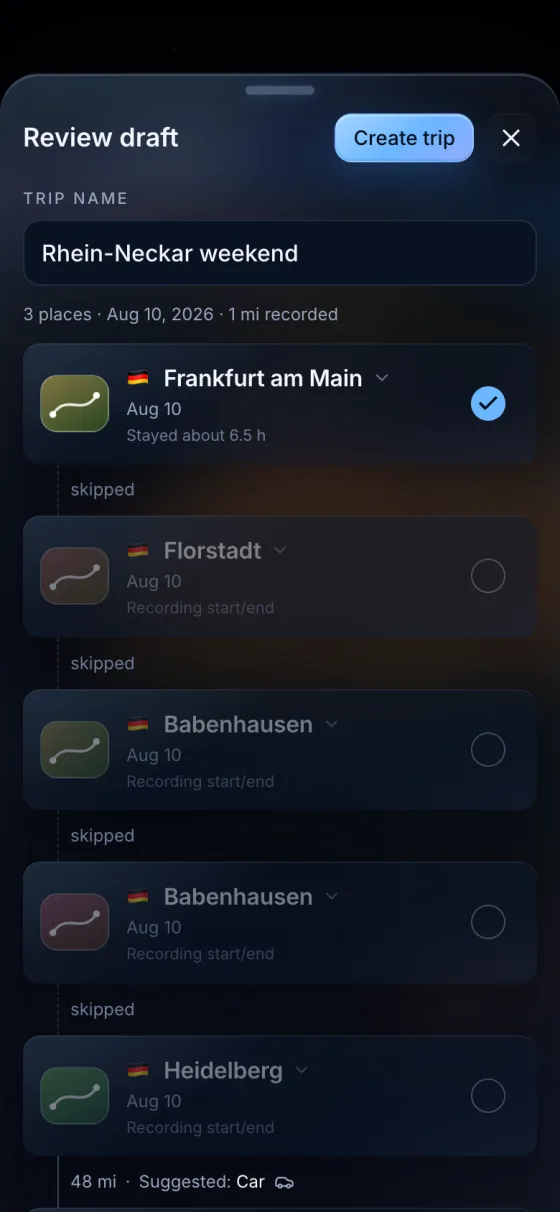
Enter a Trip name. Include the places that belong in the film and exclude places outside the trip. Inspect dates, stays, transfers, and the lines between kept places after each exclusion. Keep at least two stops, then tap Create trip.
Correct the itinerary and choose the look
In the trip builder, add missing places, fix the order, and tap each transport row to confirm how you travelled. Add captions to describe your visits. Open Style, then Theme to choose the look of the map and lettering. In Scene, select Journey under Direction to have the camera follow your route.
Preview, export, and save
Press Play and check the route and arrivals. Open Export video and choose Aspect ratio, Resolution, and Framerate. For a first phone video, use 9:16, 1080p, and 30 fps; return to preview if you change the shape. Tap Start export, watch the finished video, then tap Save to Photos or Share….
Choose the format for the finished edit
Start with what the scan actually found
This sample Japan review represents a 271-photo selection: 248 images with usable location and time information and 23 skipped images. It shows six proposed stops plus Narita as a transfer candidate: Berlin, Narita, Tokyo, Hakone, Kyoto, Nara, and Osaka.
- Selected
- 271 photos
- Located
- 248 photos with usable location and time information
- Skipped
- 23 photos without usable location information
- Draft
- Six stops and one transfer candidate
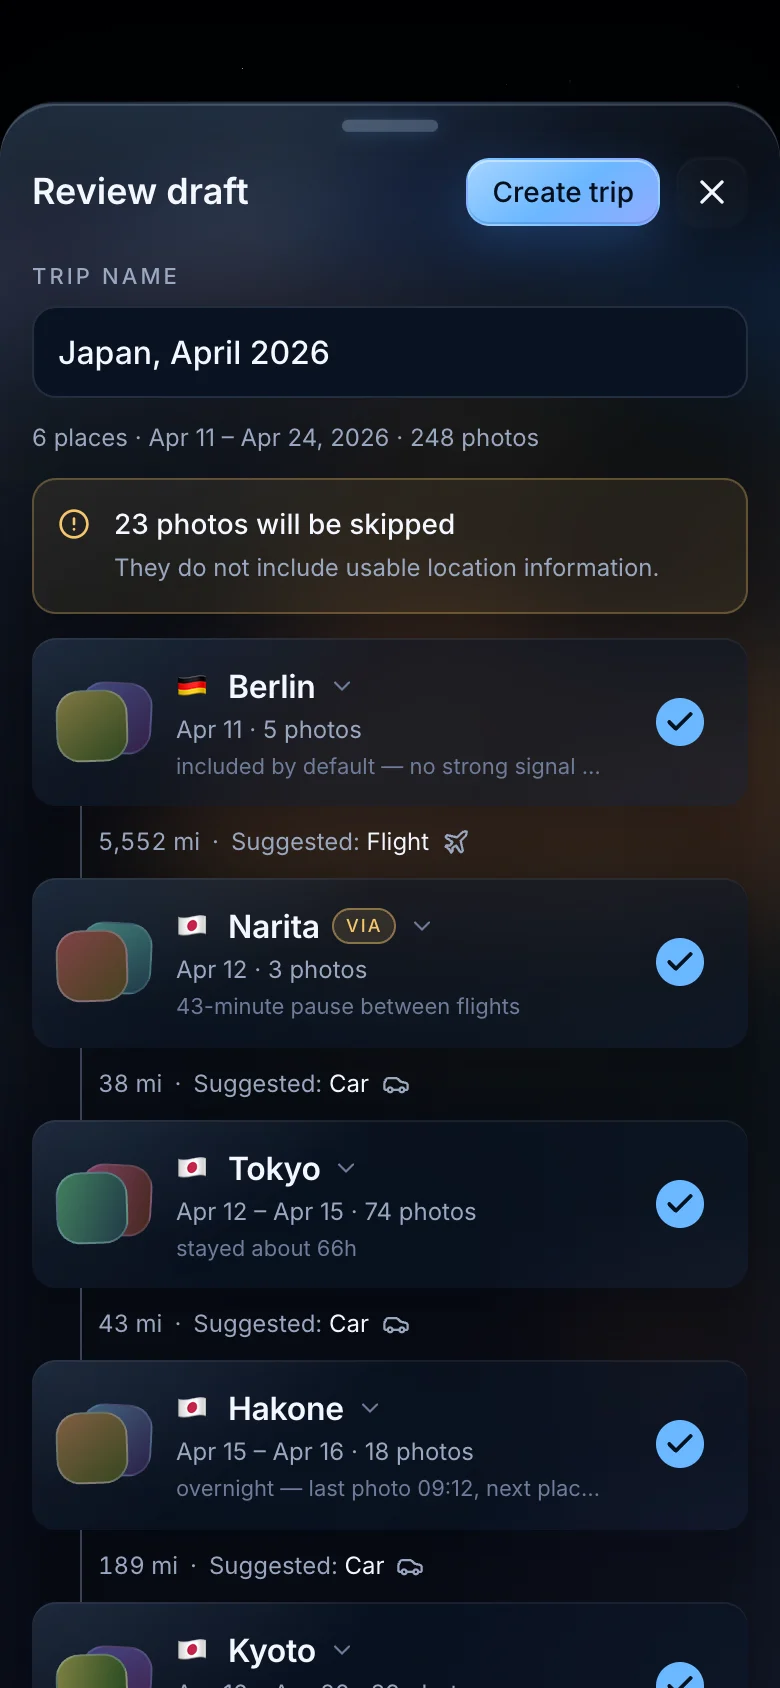
A skipped photo cannot help place the route. Screenshots, downloaded images, exported edits, and photos taken with location disabled may lack the information TrailVid needs. Add any missing destination manually after import.
Decide what each candidate place contributes
Check the dates, time spent, and place together. A few airport photos can explain a transfer; a large group of home photos may fall outside the journey. Review each row before keeping its arrival in the film.
Is it an endpoint or chapter?
Keep it when the trip begins or ends there, or when it introduces the next part of the film.
Was the time a visit or transit?
A long stay can support a chapter. A brief pause between flights usually explains the route rather than earning an arrival.
Does the route still make sense without it?
Exclude the row and inspect the new line between the places above and below it. Keep the place if that direct connection misrepresents the journey.
Does the arrival deserve screen time?
If the footage already tells the moment and the map adds nothing, the place can stay out of this cut.
Make the difficult calls in the Japan draft
Berlin has five photos from the day before departure. Keep it for a door-to-door story that begins at home. Exclude it when the film is strictly about Japan. Check that the first included place matches where you want the film to begin.
Narita has three photos and a 43-minute pause between flights. This example excludes the transfer, connecting Berlin directly to Tokyo so the film introduces Tokyo as the next destination.
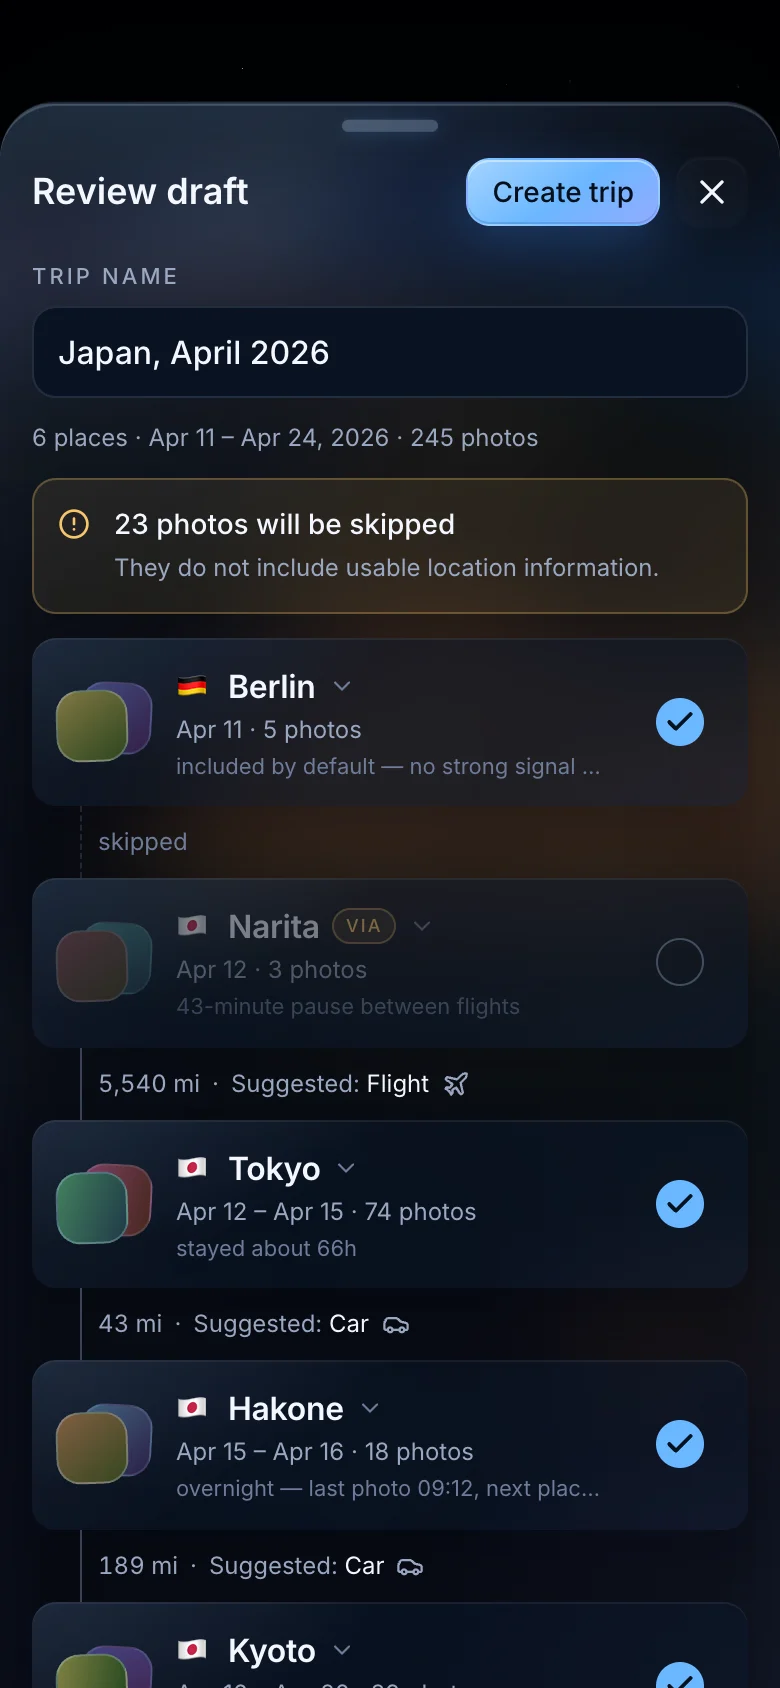
Hakone has 18 photos across an overnight stay, so it earns a stop. Nara has 12 photos from 09:31 to 18:20 inside the longer Kyoto stay. Keep Nara when the day trip is one of the film’s chapters. Exclude it when the edit treats Kyoto and its excursions as one section.
Inspect what changes when a place is removed
Each exclusion changes the route between the surrounding kept places. Confirm the order and the suggested transport after every edit. A transfer that was useful as a route clue may still be wrong as a visible stop. A day trip may need its own arrival even when it sits inside a longer city stay.
Once the route reads correctly, create the trip. Add missing places, correct transport modes, and write captions for the arrivals that survived the review. You can edit the imported itinerary in the same way as a trip built by hand.
Questions
Common questions
Do all iPhone photos contain a location?
No. Camera location may have been disabled, metadata may have been removed during editing or sharing, and screenshots usually have no useful trip location.
Does photo import add the photos to the finished video?
Photo import uses location and time metadata to draft the itinerary. The exported result is a travel map sequence; it does not place the selected photos into the video.
Can I edit the trip after importing photos?
Yes. The imported result becomes an editable itinerary. You can add or remove stops, choose transport modes, write captions, and adjust the sequence before export.